⬇️ Download this manual in PDF form Here
![]()
![]()
v1.2.8
Introduction #
I Wish is a granular note freezer. When you hit a note, the plugin plays a tiny loop at the wavelength of that note. That loop has the pitch of the note you hit, with the frequency content of the audio input. This allows the creation of an array of highly musical effects, ranging from robotic speech, through glitchy effects, to out of this world synth sounds.

The idea for this plugin idea came from Infected Mushroom’s work on their famous track, “I Wish”, in which they manually chopped and edited tiny loops for several days in order to achieve the desired special effect. This plugin creates the same effect, but instantly, instead of several days. Now that I Wish has arrived, Infected Mushroom have found numerous more uses for the plugin and have been using it extensively in their work.
For more tutorials and videos on how to use the plug-in please visit our website www.polyversemusic.com.
Have fun freezing your audio!
Infected Mushroom and the Polyverse team.
Credits #
Created By: Infected Mushroom
DSP & Code: Polyverse
UX & Visual design: Mr. Frank
Manual Editor: Clif Johnston
Special thanks to all of our beta testers who helped make this a better product!
Support #
For any support related issues please use our website:
www.polyversemusic.com/support
Installation #
To install I Wish, simply run the installer and follow the instructions on your screen. For free tutorials and videos about setting up and using I wish with your favorite DAW (Digital Audio Workstation), please visit our website at https://polyversemusic.com/support.
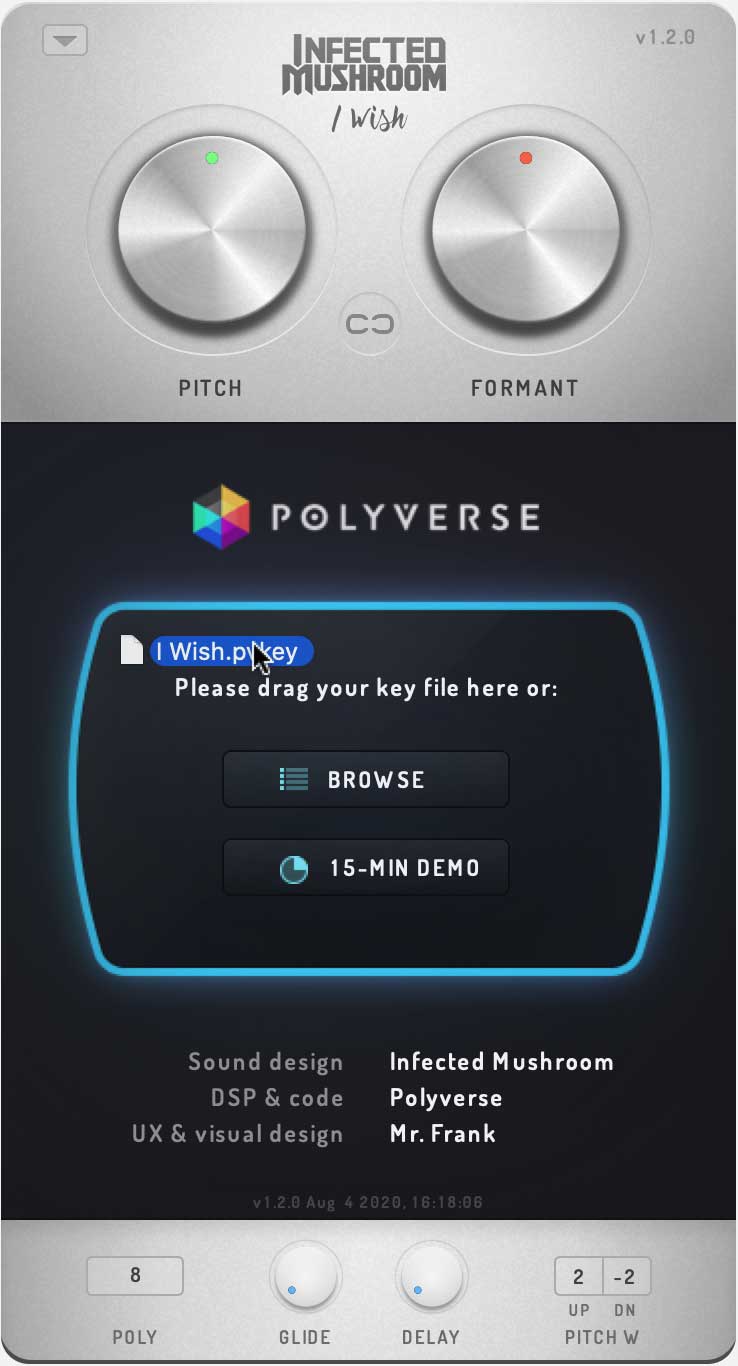
When using I Wish for the first time, a registration dialog will appear. To register and authenticate the plugin, first download, then drag and drop the key file you have received in your purchase confirmation email onto the dialog box.
If you’ve lost your confirmation email, you can re-request one from our support page at https://polyversemusic.com/support.
Compatibility:
Windows: 64/32 bit VST, AAX
OSX: 10.8+ 64 bit VST, VST3, AAX, AU
Quick Start #
Cubase #
- Add an audio track
- Add I Wish as an insert effect
- Place an audio file in the track
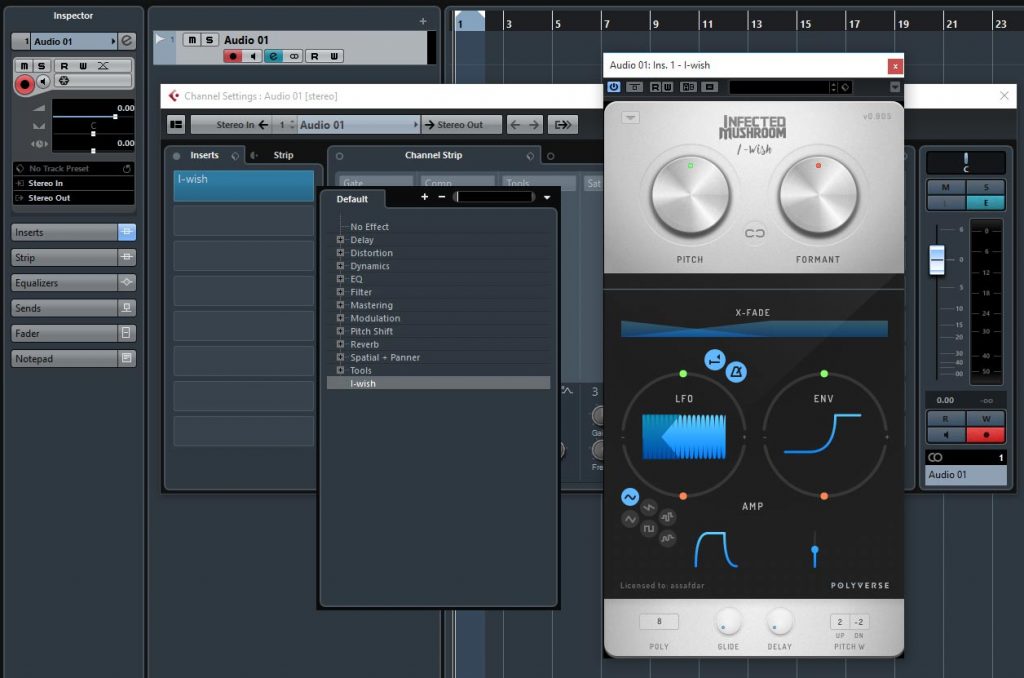
- Add a MIDI track
- Set the MIDI track’s output to the I Wish plugin.
- Play some midi notes as the audio streams through the plug-in.
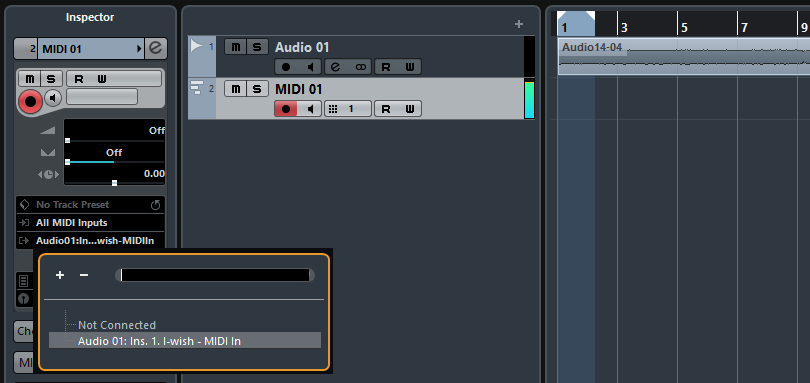
- If this does not work, try selecting the “init” preset
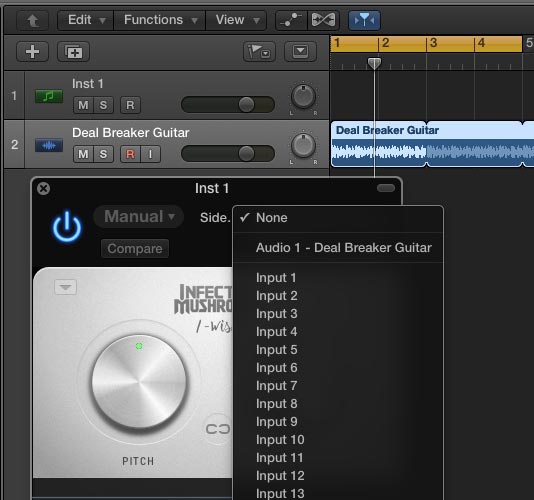
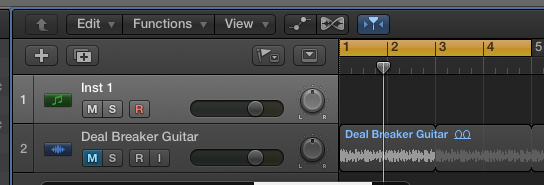
Logic #
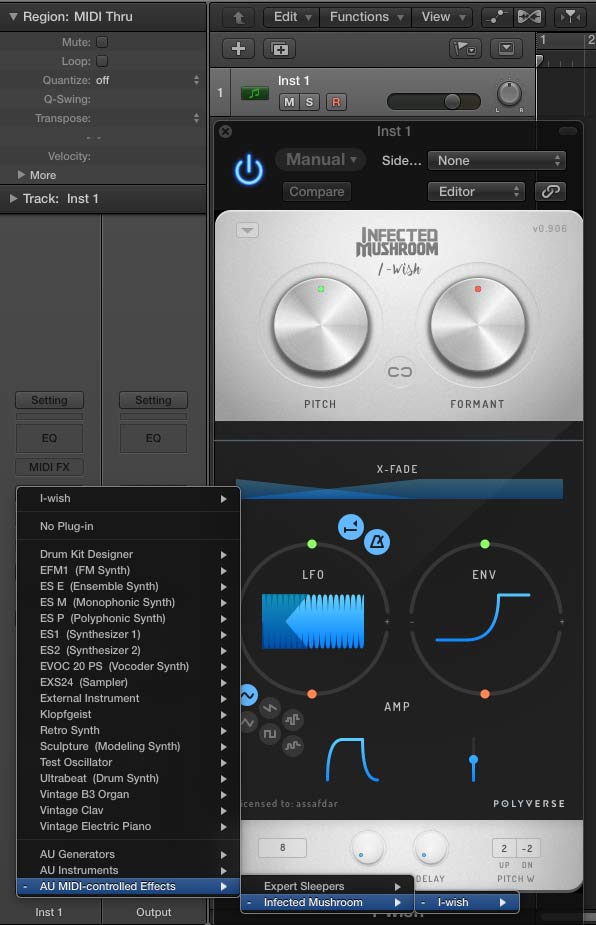
- Open an instrument track
- Click on the instrument slot to select I Wish
- Open a new track and place your audio file inside it.
- Open I Wish plugin and in the top right select your sidechain input to be the same as the audio track.
- Mute the original track, select the plugin’s instrument track,
- Play some midi notes as the audio streams through the plug-in.
- If this does not work, try selecting the “init” preset
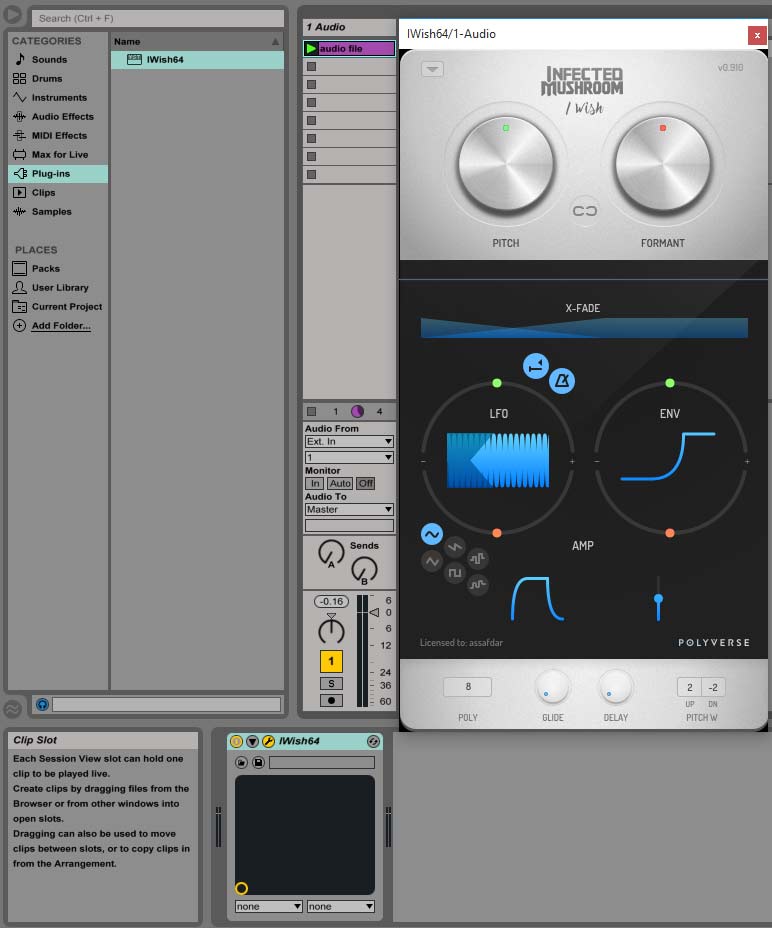
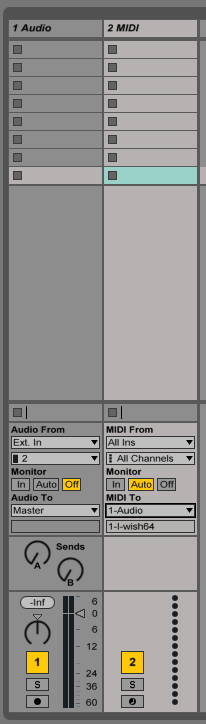
Ableton Live #
- Click the “I-O” button to show the input and outputs.
- Create an audio track with I Wish on it, and drag some audio onto it.
- Create a blank MIDI track
- Set the MIDI output to the track with I Wish.
- Play some midi notes as the audio streams through the plug-in.
- If this does not work, try selecting the “init” preset
FL Studio #
- Drag an audio file to your playlist and route it to “Track 1” on the mixer.
- Load I Wish as an insert on “Track 1” on your mixer.
- Open a “MIDI Out” plug-in and set the Port to 1.
- Set the I Wish Midi input port to 1 as well.
- Select the “MIDI Out” channel,
- Play some midi notes as the audio streams through the plug-in.
- If this does not work, try selecting the “init” preset

Sonar #
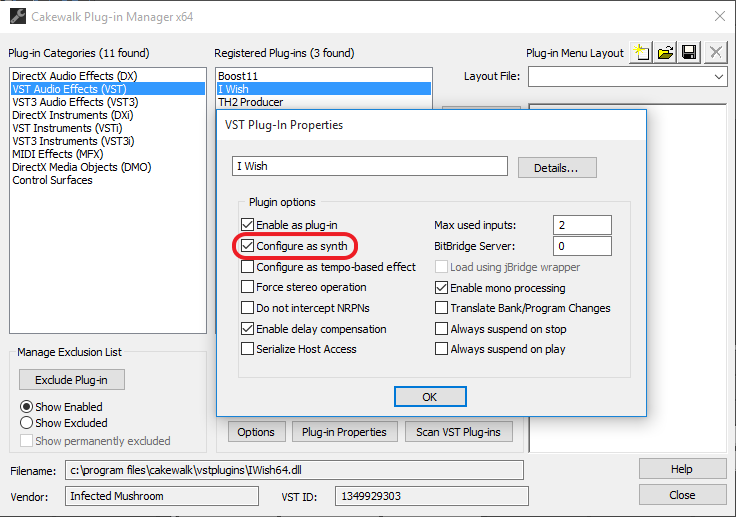
- Configure I Wish as a synth in “Cakewalk Plug-in Manager”
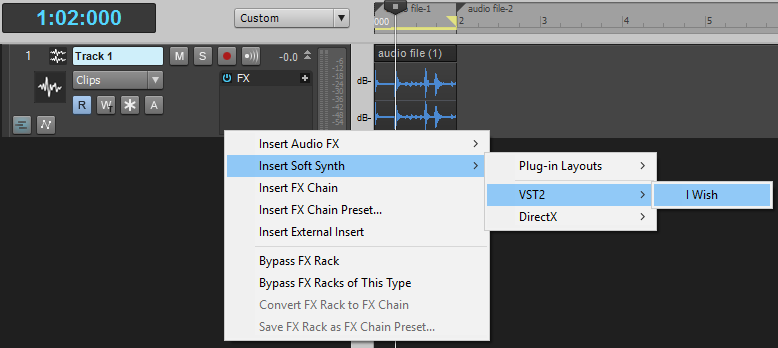
- Import an audio file to an audio track ,
- Inset I Wish as a “soft synth” on that track.
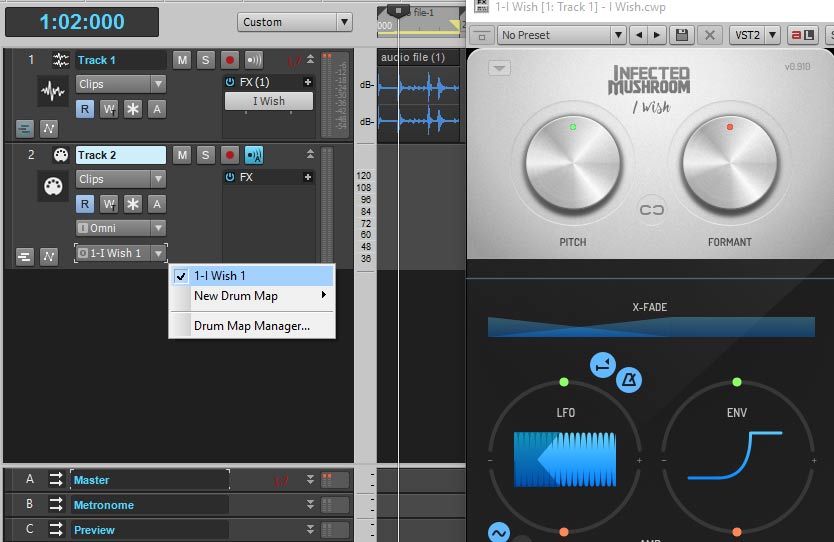
- Create a new MIDI track,
- Set the MIDI track’s output to I Wish .
- Play some midi notes as the audio streams through the plug-in.
- If this does not work, try selecting the “init” preset.
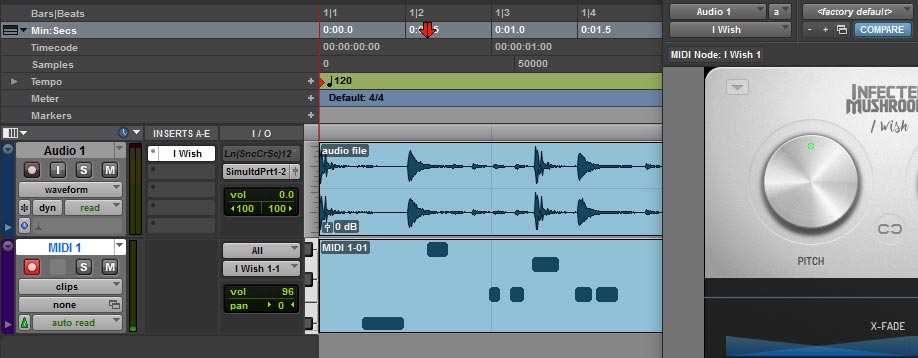
Pro Tools #
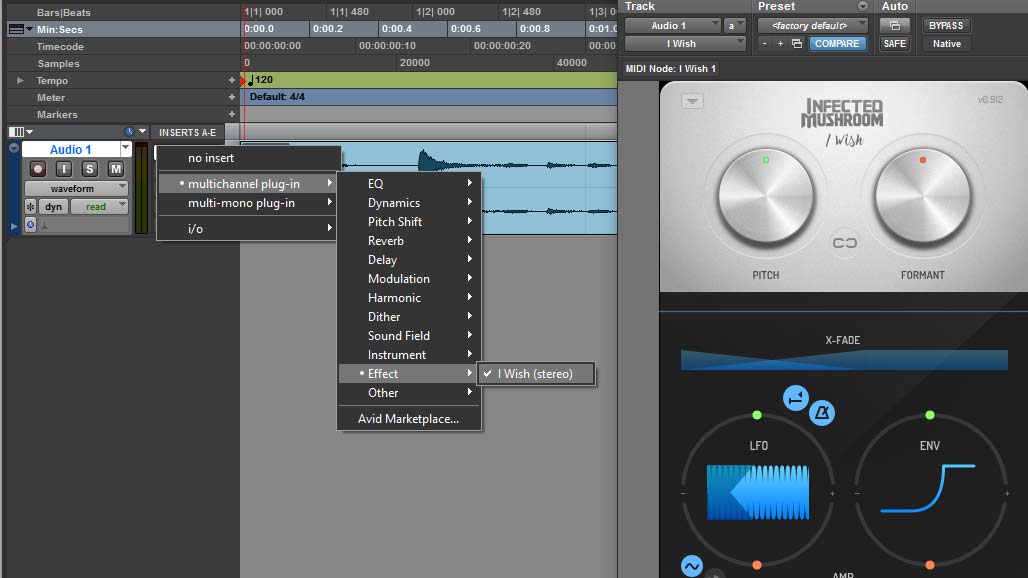
- Create a new audio track, and
- Add I Wish as an insert effect
- Place an audio file in the track

- Create a new midi track
- Route the midi track’s output to the plug-in
- Arm the midi track
- Play some midi notes as the audio streams through the plug-in.
- If this does not work, try selecting the “init” preset.
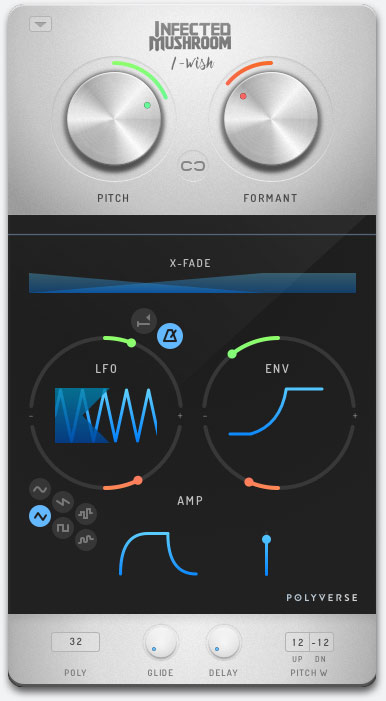
Loop Controls #
PITCH
The PITCH control changes the length of the loop according to the wavelength of the note pressed, thus changing the loop’s pitch. It has a range of two octaves up and two octaves down, in semitone steps. To enable fine adjustment, press the shift key while moving the control.
FORMANT
The FORMANT control changes the playback speed of the audio within the loop, shifting the pitch of the overtones (but not the fundamental) up or down. It has a range of two octaves up and two octaves down, in semitone steps. To enable fine adjustment, press the shift key while moving the control.
LINK
The LINK control creates a tape-like effect by linking the PITCH and FORMANT controls, as well as the modulation amount controls for the pitch and formant. Click the LINK icon to activate or deactivate this feature. Turning the pitch control will also turn the formant control, while turning the formant control will set the offset between the two controls.
X-FADE
The X-FADE control smoothes the loops by applying a crossfade between the beginning and the end of the loop. This control determines the crossfade duration, and thus the amount of smoothness of the loop.
AMP Controls #
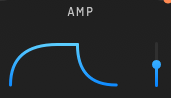
The amplifier envelope controls the speed of the crossfade between the dry signal and the wet signal. It also controls the dry/wet balance.
PLEASE NOTE: In this plugin, the dry signal is gated in an inverse relation to the wet signal, i.e. the dry signal is not really dry, but a gated version of the dry signal. This allows a smooth transition between the original sound and the loop created by the plugin.
ATTACK
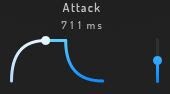
The ATTACK control sets the speed of the fade-in applied to the wet signal, and subsequently the fade-out of the dry signal. To change the attack time, click on the left envelope segment and drag left for shorter attack times, or right for longer attack times.
RELEASE
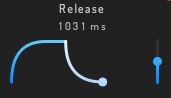
The RELEASE control sets the speed of the fade-out applied on the wet signal, and subsequently the fade-in of the dry signal. To change the release time, click on the right envelope segment and drag left for shorter release times, or right for longer release times.
WET
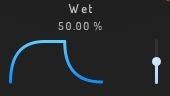
The WET control determines the balance between the dry and wet signals. To change the ratio of wet to dry signals, click on the fader and drag up for more wet signal (and less dry signal), or down for more dry signal (and less wet signal). Double-click to set the control to 50%, which is the most useful value in most cases.
PLEASE NOTE: In this plugin, the dry signal is gated in an inverse relation to the wet signal, i.e. the dry signal is not really dry, but a gated version of the dry signal. This allows a smooth transition between the original sound and the loop created by the plugin.
LFO Controls #
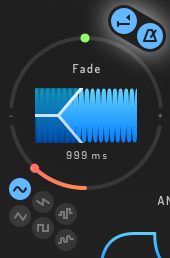
FADE
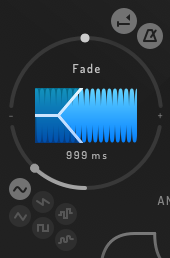
The FADE control sets the delay time before the fade-in of the LFO signal. Much like many classic analog synthesizers, the delay before the fade-in allows a note to start with no vibrato and increase gradually towards the end of the note. To adjust the delay time, click on the fade area, drag to the left for shorter times, or to the right for longer fade-in times.
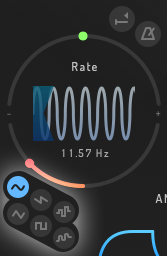
RATE
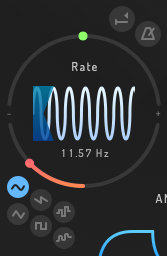
The RATE control sets the frequency of the LFO. To adjust, click on the waveform and drag to the left for lower frequencies, or to the right for higher frequencies. When the LFO is in tempo mode, this control will set beat divisions as displayed in the value monitor.
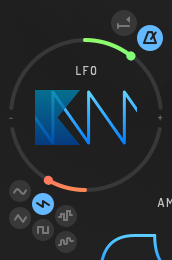
SHAPE
The SHAPE controls allows you to select between several shapes for the LFO: sine, triangle, saw down, square, random, and smoothed random. To select a waveform, simply click on the desired shape.
RETRIG
When the RETRIG button is active, the LFO position will reset to the beginning of the waveform every time a MIDI note is received.
TEMPO
When the TEMPO button is active, the LFO frequency will be quantized to the tempo. To change the tempo division value, click on the waveform and drag to the left for slower rates, or to the right for faster rates. If the RETRIG button is off while the TEMPO button is set to on, the LFO will be synchronized to the song position. If RETRIG is active, the LFO will be synced to the start of each incoming MIDI note.
PITCH LFO
The PITCH LFO control sets the amount of LFO modulation (depth) applied to the pitch. This control is bipolar, so dragging towards the plus sign will result in positive modulation, while dragging towards the minus sign will result in negative (inverse) modulation. When the control is centered, no modulation is applied. Double-clicking the control will automatically return it to the center position.
FORMANT LFO

The FORMANT LFO control sets the amount of LFO modulation (depth) applied to the formant. This control is bipolar, so dragging towards the plus sign will result in positive modulation, while dragging towards the minus sign will result in negative (inverse) modulation. When the control is centered, no modulation is applied. Double-clicking the control will automatically return it to the center position.
Envelope Controls #
The envelope can be used to modulate the pitch or formant. This envelope has two stages: DELAY and DECAY. It starts from zero and stays there for the duration of the DELAY parameter, and then ascends towards the maximum at the speed of the DECAY parameter. 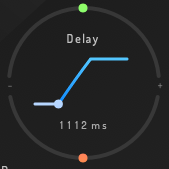
DELAY
The DELAY control sets the time it takes for the envelope to start working, ranging from 0 to 5 seconds. To change the delay time, click on the left envelope segment and drag left for shorter delay times, or right for longer delay times.
CURVE
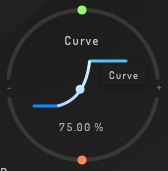
The CURVE control changes the curve of the envelope. To change the curve, click on the middle segment of the envelope and drag up for a more exponential envelope, or down for a linear one.
DECAY
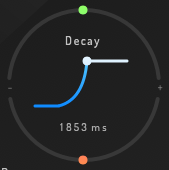
The DECAY control determines the time it takes the envelope to reach its maximum state, ranging from 0 to 5 seconds. To change the decay, click on the right envelope segment and drag left for shorter decay times, or right for longer decay times.
PITCH ENV
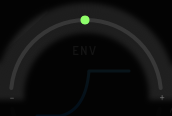
The PITCH ENV control sets the amount of envelope modulation (depth) applied to to the pitch. This control is bipolar. so dragging towards the plus sign will result in positive modulation, while dragging towards the minus sign will result in inverse modulation. When the control is centered, no modulation is applied. Double-clicking the control will automatically return it to the center position.
FORMANT ENV

The FORMANT ENV control sets the amount of envelope modulation (depth) applied to to the formant. This control is bipolar. so dragging towards the plus sign will result in positive modulation, while dragging towards the minus sign will result in inverse modulation. When the control is centered, no modulation is applied. Double-clicking the control will automatically return it to the center position.
Global Controls #

POLY
The POLY control sets the number of voices that can be played at the same time. To set polyphony, click and drag up or down, or click on the + or – buttons to change the number of voices playing.
There are two special monophonic modes: Mono and Legato. In Legato mode, there is no glide between notes unless they are overlapped. In Mono mode, there is always glide between notes, whether they are overlapped or not.
GLIDE
The GLIDE control sets the speed of the pitch glide. Turning the knob to the left will result in shorter glide speeds, and turning it to the right will result in longer glide speeds. Please note that GLIDE is a constant speed, not a constant time.
DELAY
To allow transients to pass through on tempo, the I Wish plugin implements a midi delay. The DELAY control sets the midi delay time in milliseconds. Turn the knob to the left for less or no delay, and to the right for up to a 1 second delay.
Note: if you turn the DELAY knob all the way to the right, it will enter “Pitch” mode, which uses the note’s wavelength to determine the delay time. You may find it more natural to play the plugin live this way, since it behaves as if the plugin starts recording when you press a key. When not in Pitch mode, the plugin records continuously, and plays a pre-recording when you hit a key.
PITCH W
The PITCH W controls set the amount of pitch-bending effect the pitch wheel will have on the plugin. It is possible to set different values for both the up direction or down direction. To change values, simply click and drag up and down, or click on the arrows to set the desired value.
Preset List #
To manage and switch presets, we recommend that you use your DAW’s preset functionality. However, this plugin does offer a very basic method for exporting and importing presets.

To open the preset list, click on the arrow to show the preset menu. The presets saved can be found in the following positions:
MAC: <user>/Library/PolyVerse/IWish
PC: \Users\<user>\AppData\Roaming\PolyVerse\IWish
Save Preset – stores the preset inside the preset list
Delete Preset – deletes the selected preset from the preset list
Load Bank – loads a bunch of pre-saved presets.
Save Bank – saves a bunch of pre-saved presets.
Special operations #
Right-click (or control-click on a Mac) any control on the plugin to receive the following menu:
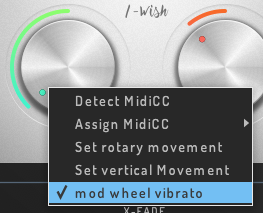
DETECT MIDI CC
To use the “MIDI learn” feature, click the DETECT MIDI CC option for the desired control, and then move the knob or fader on your controller that you wish to associate with that control. The plugin will wait for a MIDI control change signal, and then assign the control number and channel to the corresponding control on the plugin.
ASSIGN MIDI CC
If you need to assign a MIDI CC to a control manually (e.g. your DAW is sending multiple simultaneous MIDI messages), hover over ASSIGN MIDI CC and then choose the desired CC number from the pop-out menu.
SET ROTARY MOVEMENT
The SET ROTARY MOVEMENT option sets the knobs to have a circular control motion. While this option may seem less intuitive, it offers much more precision for fine tuning your plugin controls. Tip: After you click the control, move in large circles around it. Larger circles will result in more resolution.
SET VERTICAL MOVEMENT
The SET VERTICAL MOVEMENT option sets the knobs to have a vertical (up and down) control motion. Although rotary controls are recommended, some users find vertical controls more comfortable.
MOD WHEEL VIBRATO
The MOD WHEEL VIBRATO option assigns the LFO to the modulation wheel for vibrato effects. This option is enabled by default, but may be turned off if you would like to use the modulation wheel for a different purpose.
Enjoy using I Wish!